Frankensword Breakdown – Pt 1
This ended up being longer than I expected, so I’m breaking it up into two parts. Part 2 will focus on the Unreal presentation.
I first started the Frankensword over two years ago. A very rare case of something I made to nigh completion except for the final presentation, but then abandoned for years and only recently I was motivated to polish that presentation and call it done.
I thought people may find it interesting/helpful if I wrote up how I put everything together, just bear in mind that since there was such a huge gap in time I don’t fully remember how everything was made.
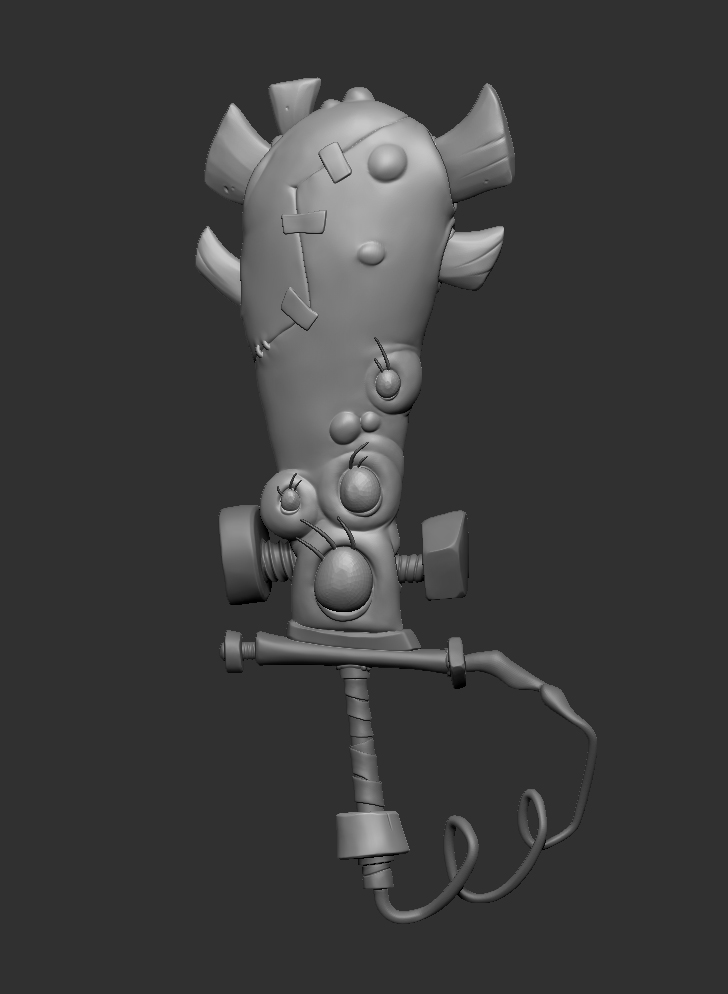
There’s not too much special about creating the actual sword, but I’ll walk you through the stages. When I initially started all I knew is that I wanted to make a cool stylised prop with PBR materials. I thought the Frankensword concept would work perfectly because it had so many different surfaces (flesh, metal, glass, fabric).
Sculpting
I approached it the same way I do with any high to low workflow asset. Started with a base mesh block-out in Maya. It doesn’t have to be too accurate or detailed, mainly I want a mesh for every element because I find it way easier to do in Maya than ZBrush.
Next is the sculpting stage in ZBrush. I don’t really have any secrets to share here. I might’ve used some of Orb’s excellent brushes for some details, otherwise it’s just the same standard few brushes I use for everything. Also, plan ahead and keep elements split up into subtools for baking later.
Retopo
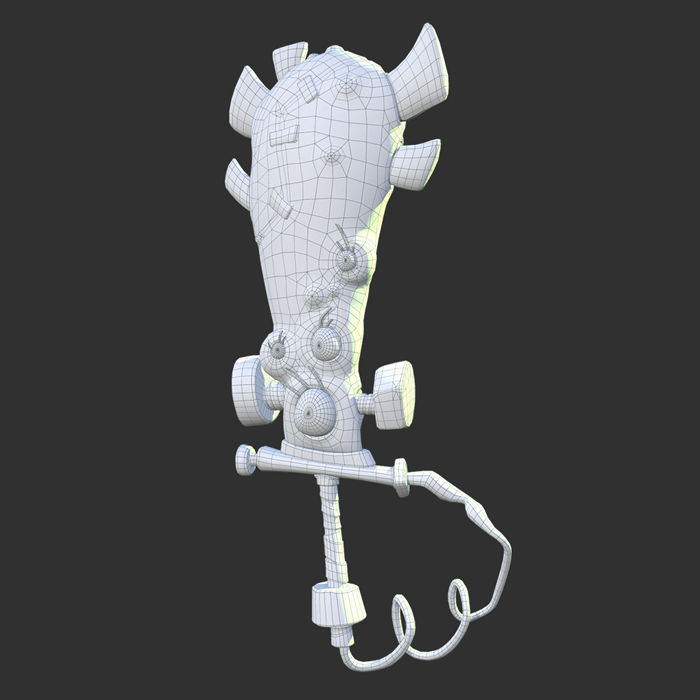
Next step I took the decimated sculpt into 3DCoat because it has great retopo tools. I probably did almost all of it by hand just placing points and pushing them around. I tend to always lean on the frugal side of poly count, all-up the final mesh came to 14.3k tris which I don’t think is too crazy, but if I knew back then I was going to give it jiggly physics animation I would’ve given the flesh part of the sword more geo resolution.
UVing
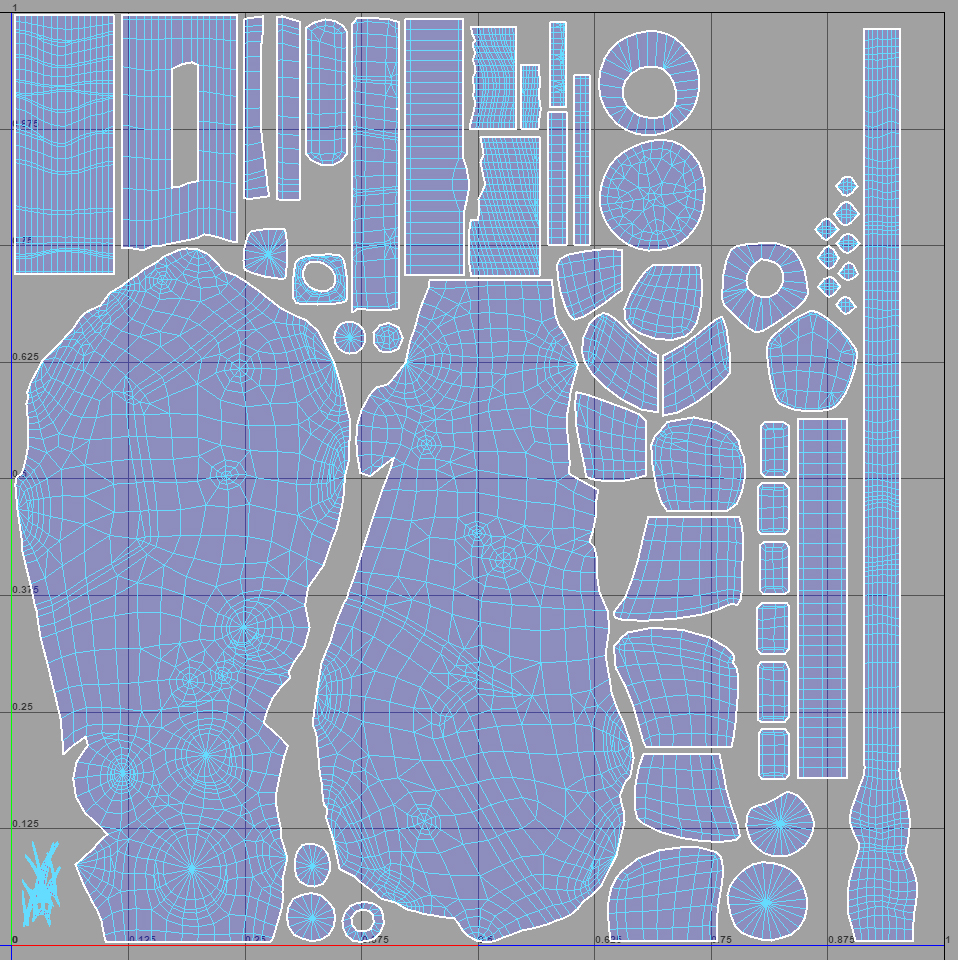
I went back to Maya for doing the UVs. Yes, I jump around between software a lot but it really makes sense to use whatever software does the best job/you’re most proficient with even if it’s just a single part of the process. And I will never diminish the importance of UVs; I probably harped on about it in my diorama breakdown video too, but it’s so important to spend the time creating clean and efficient UVs to get the most out of textures. I will judge the merit of a 3D artist based on their UVs (though most are too cowardly to show them).
Baking
As mentioned earlier I made sure the sculpt was split into appropriate pieces so I could set up non-intersecting bake groups in Marmoset. It may not be too important to do this for a static object, but this ended up being a very good call since the end product would deform and expose areas of the texture that are normally hidden. Marmoset is great for baking with multiple meshes and outputs every possible map you would need, plus has some great tools for fixing the funky things that can happen in a bake.

Texturing
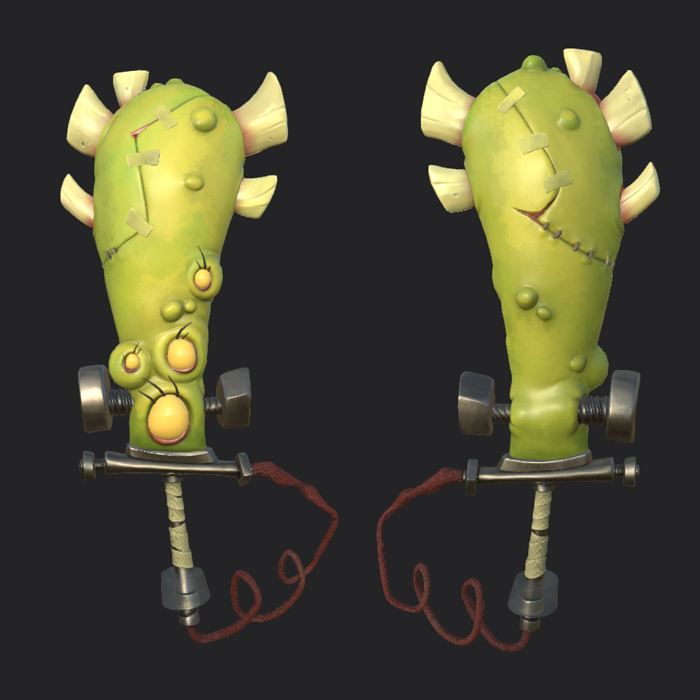
I created the textures in Substance Painter. I’m definitely not a pro with the intended Substance workflow and even think it opposes creating something that looks handmade, so I approached it much like I would painting a texture from scratch, except now I have some details from baked maps to use.
The default SP assets are all pretty horrid for cartoony style stuff like this, so I used my own custom splotchy noise patterns as a base and created a brush alpha to paint with.
I think for the metal/roughness maps I mostly just based it on the colour map and played with levels until it looked good.
At this point I had decided that the eyes were going to get special treatment, so they were each getting their own texture sheets and I made those in Photoshop.
Rigging
Here’s where things stop being chronological, because I had already imported the sword into Unreal and started experimenting to work out how this would need to be rigged once I had an idea of what kind of motion I wanted from it. It took a lot of iterations, but luckily it’s pretty easy to make these changes without breaking too much in Unreal.
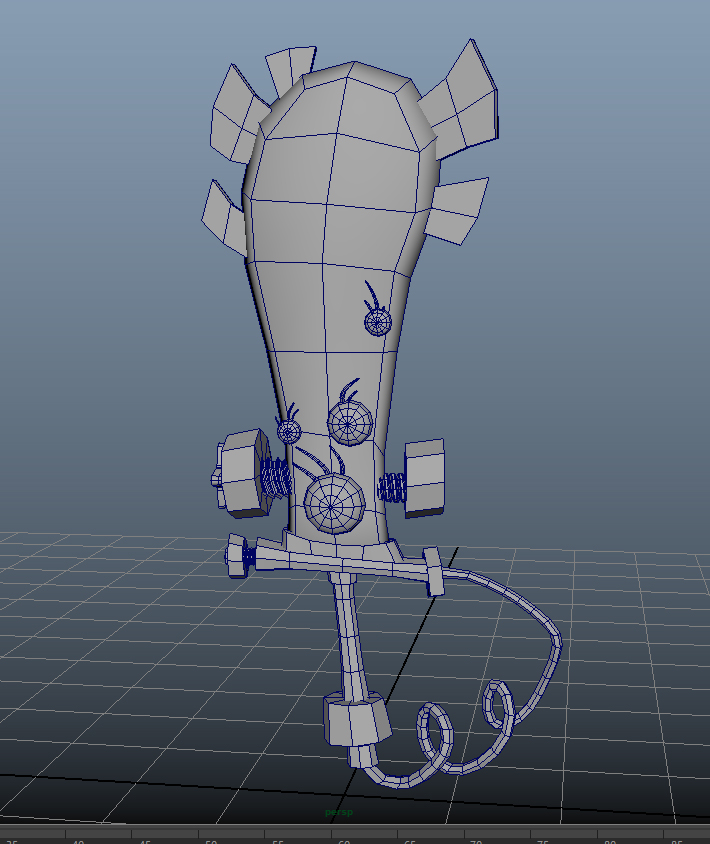
I went a little crazy with the skeleton, I just wanted to make sure I could get the maximum amount of movement out of it, so I placed joints for just about everything. Giving each eyelash its own bone is kind of extreme, I could’ve probably got the same motion with one bone for each group of lashes.
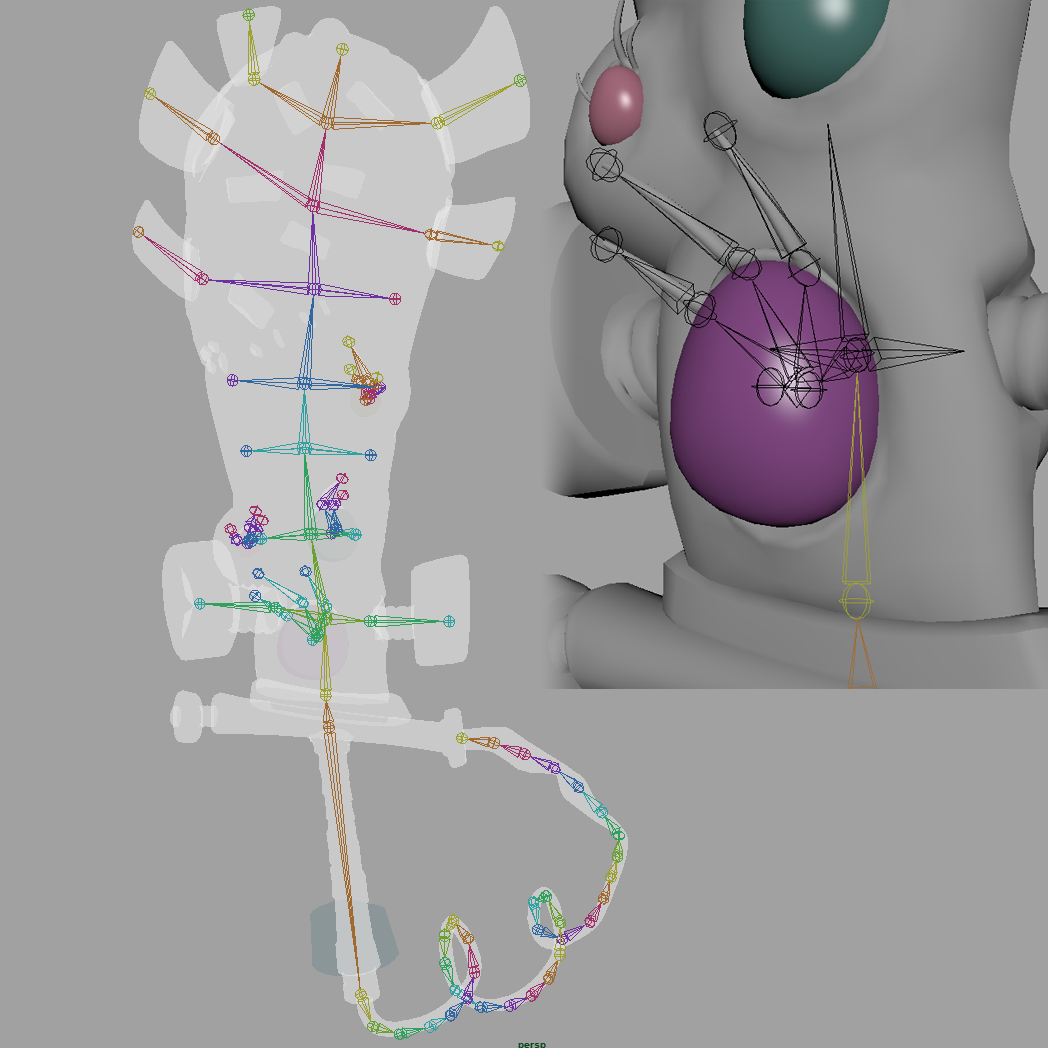
Originally I had all the geo combined into one mesh, but for reasons I’ll get into later, I separated the cable part and also gave it its own skeleton. I tried doing a really simple joint chain of like 6 joints to approximate the cable but it wasn’t giving good results, so I went all out and made a chain to follow the cable perfectly. The way to do this is in Maya is draw a curve and then in bonus tools there is a tool to generate a joint chain along a curve.
For skinning, I don’t have much advice. I’m not convinced there is a way to skin that isn’t horribly painful. All I do is a bind skin with the default weight calculation that sucks, and then I go in and paint out all the errors. For tackling specific areas, start at the end of a joint chain and work your way up the chain, locking influences when you are happy with it (otherwise depending on the method, Maya likes to fuck up things that you’ve already done).