Frankensword Breakdown – Pt 2
This is Part 2 of the breakdown, you can find Part 1 here.
This will focus on the presentation of the piece and what I had to do in Unreal 5 to reach the final renders/cinematic. Let’s get into it.
Materials
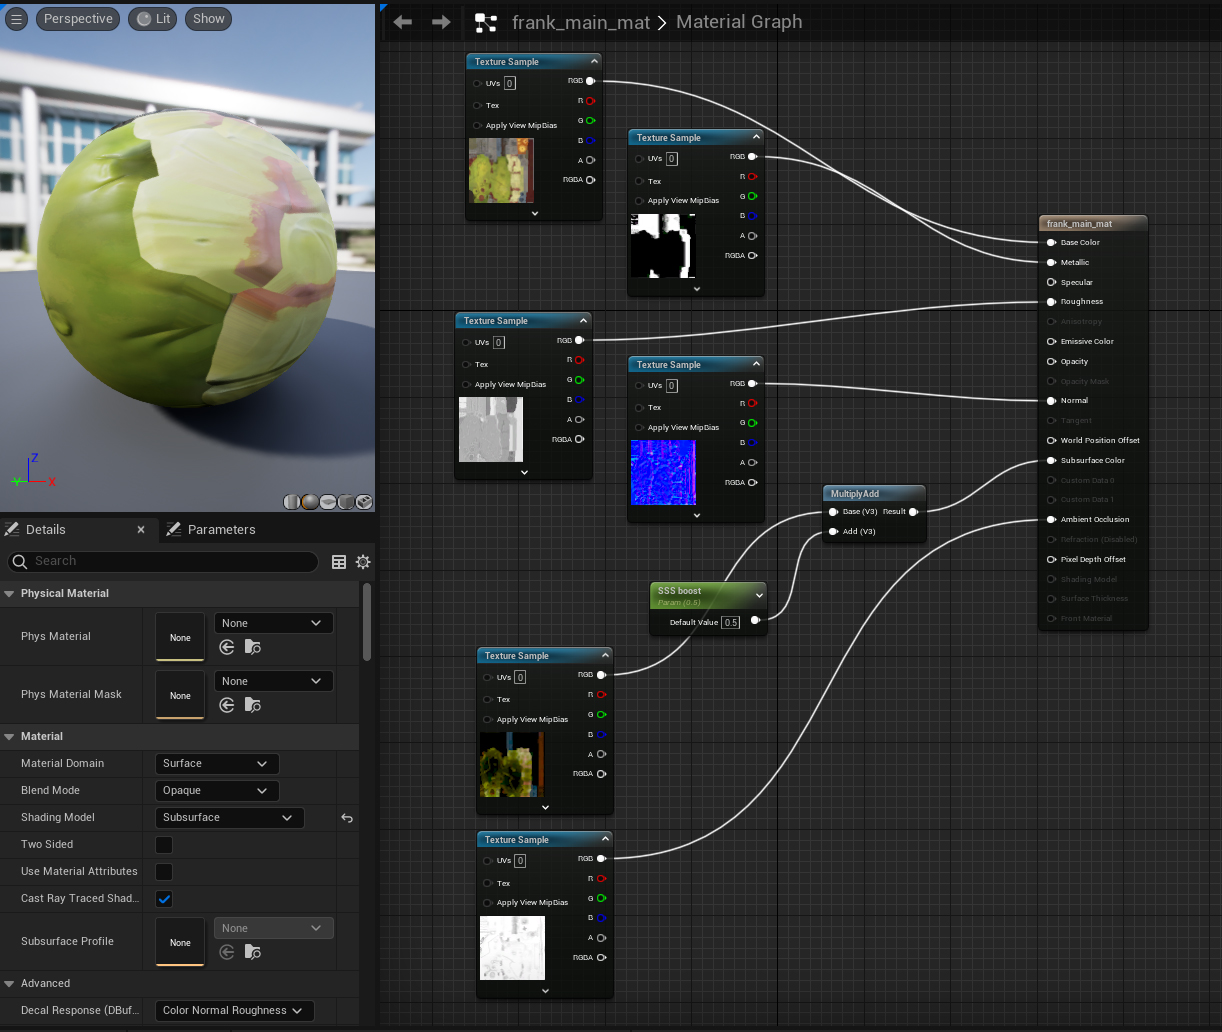
I used a total of six materials: one for each eye, one for the glass, and one for everything else (the main sword body).
The main material is nothing special, it is mostly default and takes a color, roughness, metal, normal, AO, and sub-surface map. The SS was kinda weak so I added a strength multiplier so I could really see the light coming through the teeth and flesh.
The glass material is translucent and has a fresnel effect and uses a little bit of refraction because it looks cool.
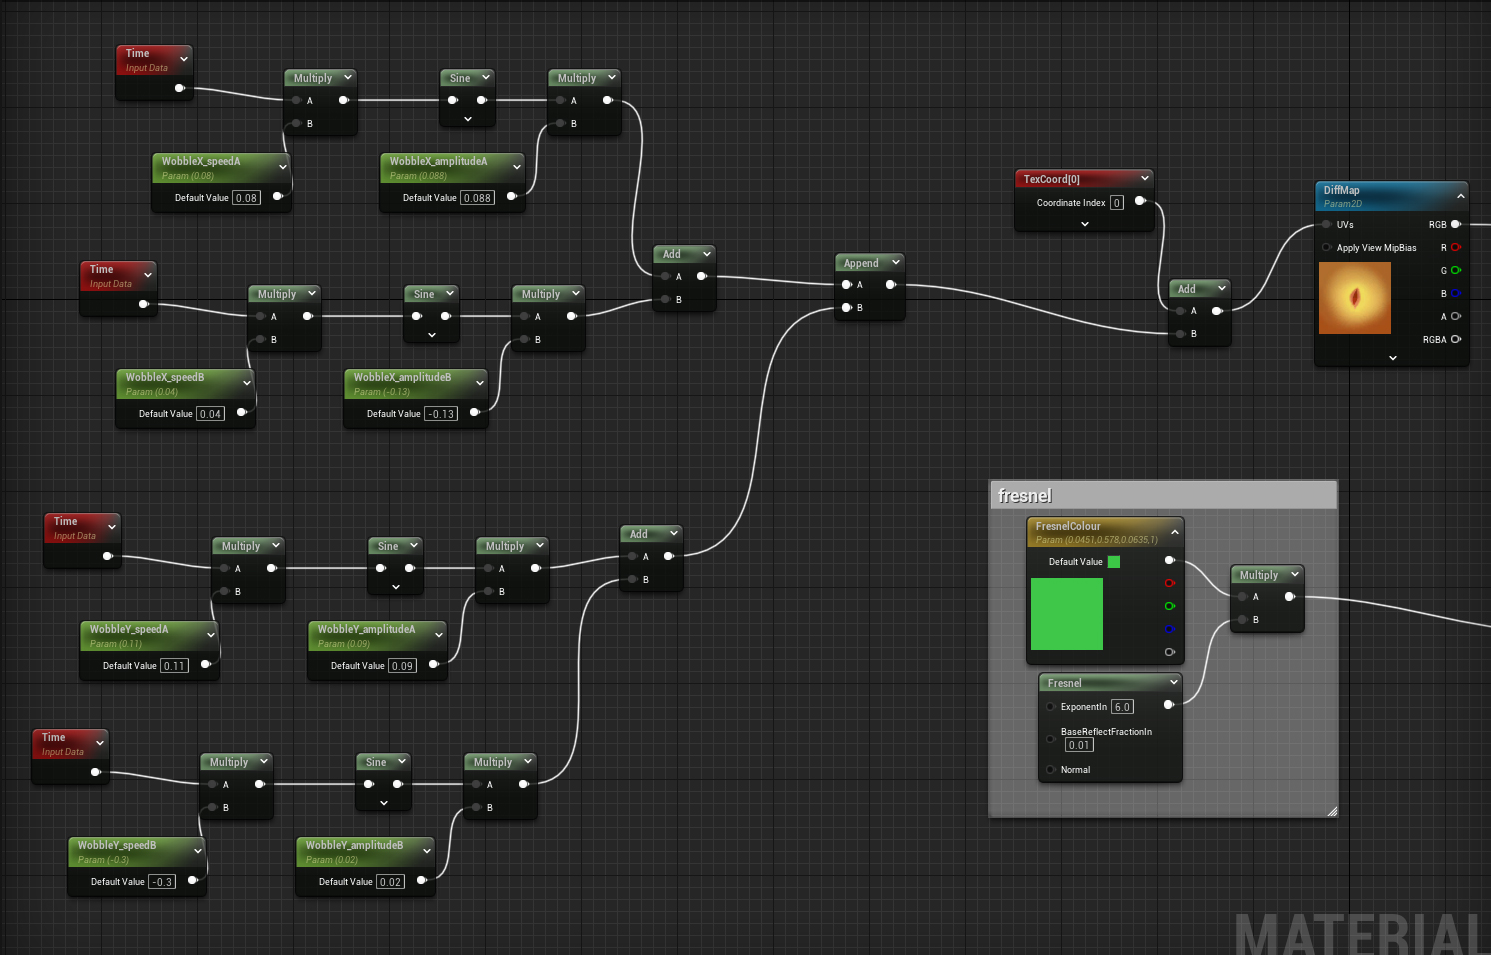
The eye was the most complicated material. I knew I wanted the motion of the eyes looking around. Because they are all weird non-sphere shapes I couldn’t just animate them rotating, so I opted for a shader that moves the UVs which gives a pretty good effect. I yoinked someone else’s method to use sine waves to give the illusion of random movement in x and y (sorry guy, don’t remember where it was from). I just had to tweak the values so that the pupils wouldn’t moved too far from the centre.
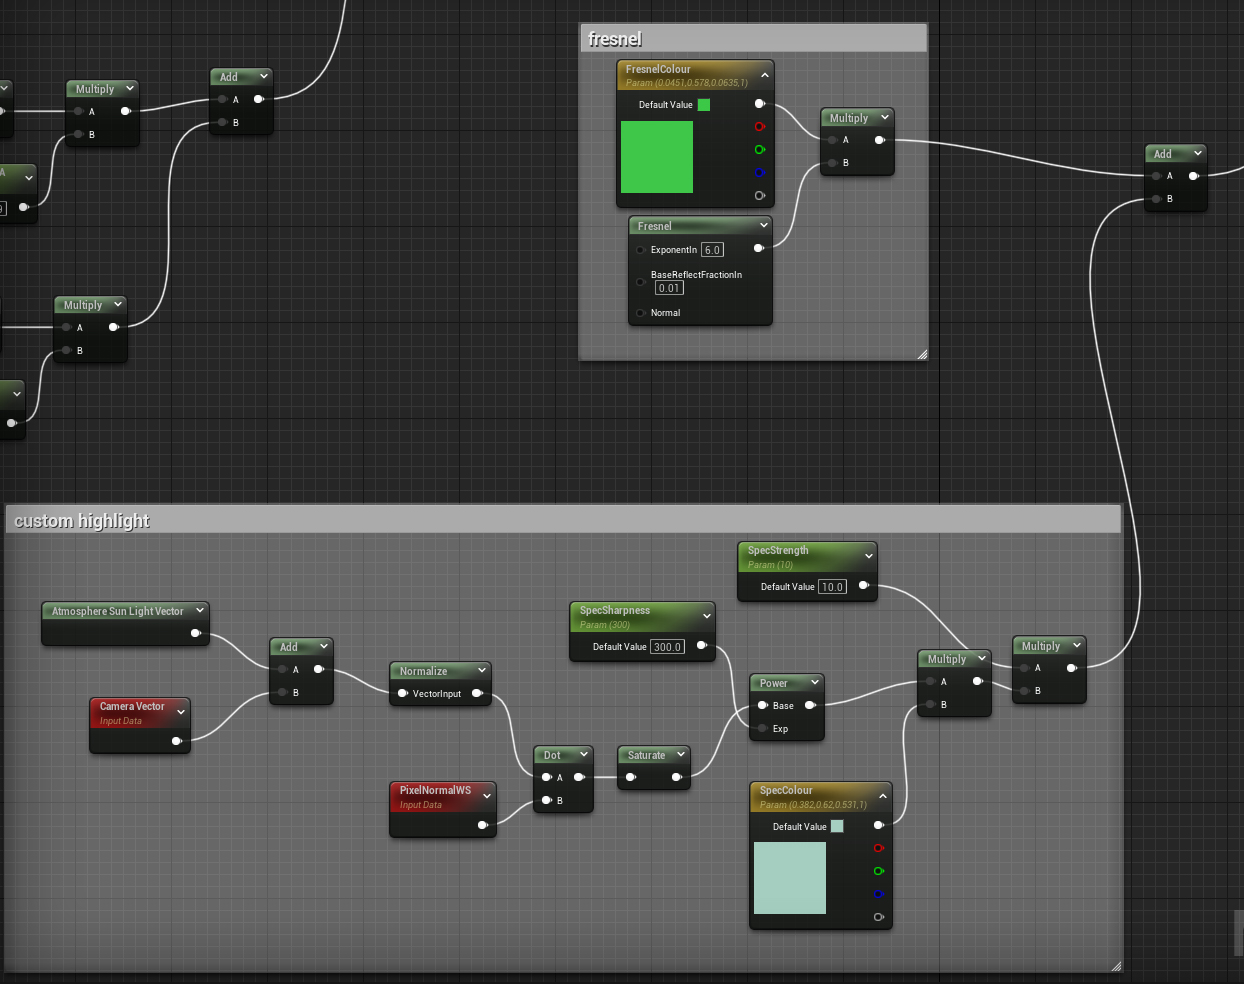
The next thing I wanted to improve was that “Perfect PBR” look that comes with Unreal was interfering with the style I was aiming for. I really didn’t like seeing perfect reflections in the eyes, and that I didn’t have much control over how the specular highlight looked. I messed around with a few ideas but in the end I thought faking it all would work fine for this. I hunted around for people’s examples of toon/cel shading online, and let me just say that it can be hard finding good resources for Unreal 5 stuff. Funnily enough when I searched for Unity Shader Graph examples I found this great video by Ben Cloward who actually explains the maths behind it, and the final graph was much simpler than any others I saw. Check out his channel, he has lots of good tech art videos. So I ended up getting a nice and simple fake highlight effect where I could adjust the size, colour and sharpness of it which worked great. I also added a coloured fresnel for good measure, because that helps with any glossy surface look.
There was even more that I could’ve done with the eyes, like I thought about using a parallax occlusion effect to fake depth of pupils but ultimately I just wanted to move on because it looked good enough.

Animation Setup
I mentioned this in the diorama breakdown video, but when making a portfolio piece I strongly urge artists to think about what is some extra thing you can do with it so that it isn’t just a screenshot of a textured model? In my case, I decided I want to give the sword some procedural/physics driven movement (something I’d never done before). After a lot of reading the Unreal docs, I landed on Animation Blueprints being the thing that would give me what I wanted.
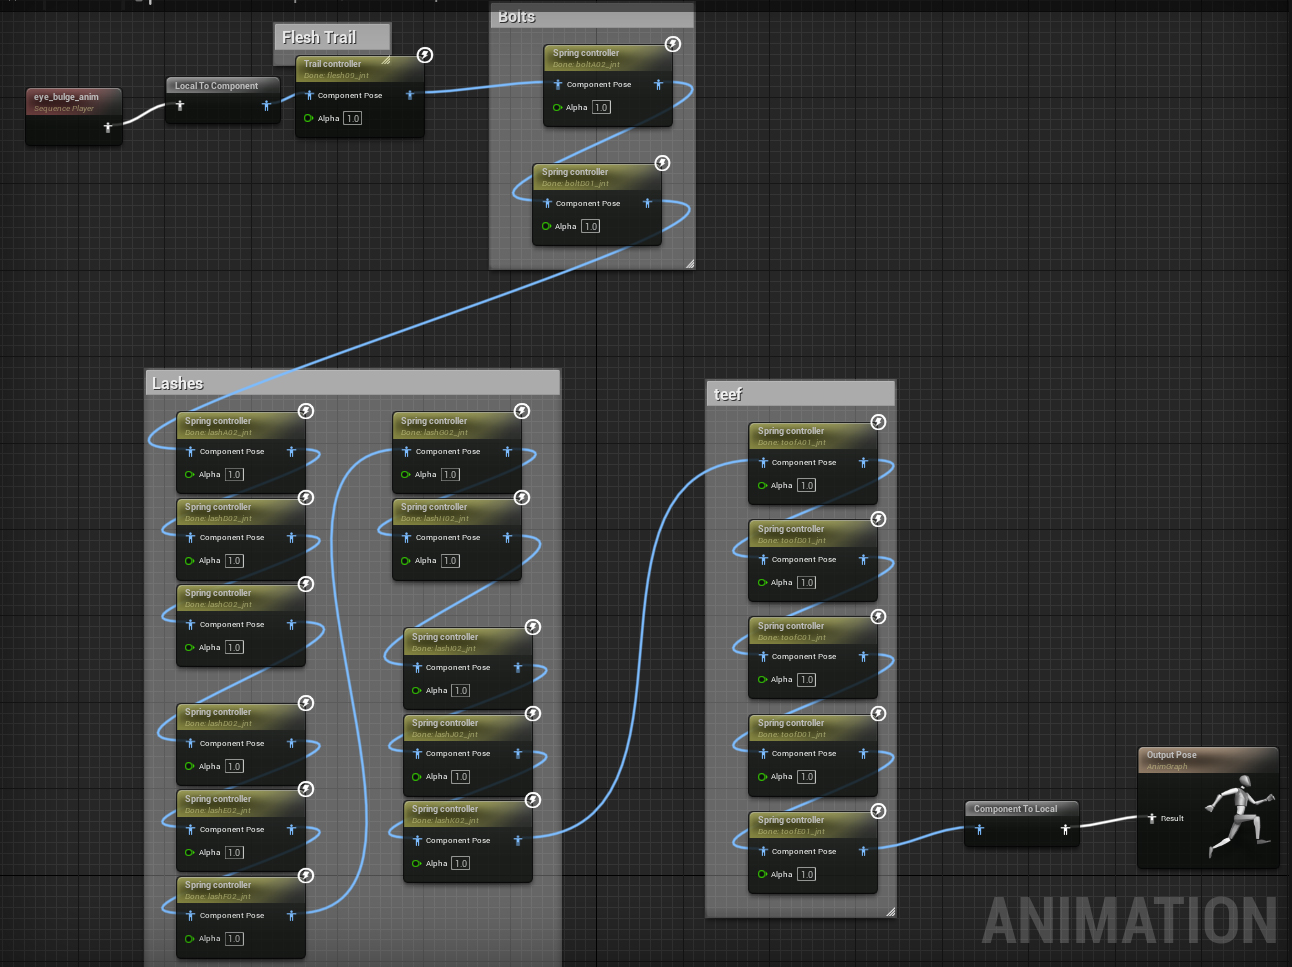
The Trail Controller was used on the “spine” of the body and gave the effect of flesh bending and springing back into shape when the sword moved. The things I changed were limiting the stretch and increasing Relax Speed Scale, which made the movement less floppy.
The other controller is the Spring. Spring Controllers for everything! On the bolts, eyelashes, and teeth (though honestly adding them on the teeth didn’t change much). Super easy to implement and the effect looks great. I changed some values depending on context, e.g. the springiness of the bolts is much firmer than the lashes.

The physics motion worked great, but I still wanted the sword to look more alive. At some point while making this was watching a Dark Souls playthrough, and in everyone’s least favourite area there is an enemy called the Chaos Eater that is some weird Eldritch blender covered in eyeballs. I really liked how gross the eyes looked with the random blinking creating an almost bubbling effect. I can’t do blinks because the eyes weren’t made for it, but what I did instead was create a looping animation of the eyes individually bulging out in bursts. I added it into the Anim Blueprint and was surprised at how well it worked with the eyelash spring controllers.
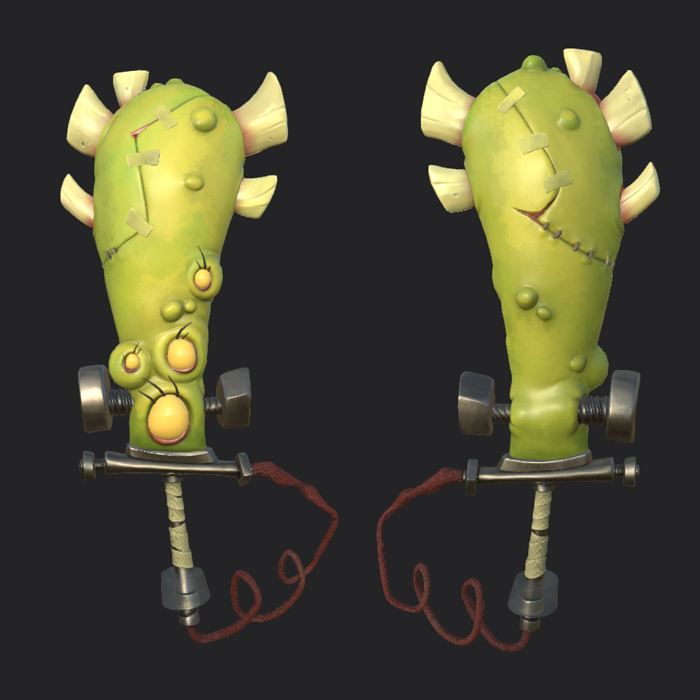
Physics Cable
You might have noticed I didn’t talk about the cable in the Animation Blueprint. Initially I thought that would be the answer, just use another Trail Controller, simple. NO SUCH LUCK. Unfortunately it seems like the Trail Controller is meant to be used in one specific way, where the start of the joint chain is fixed in place, and the following joints are affected by the parent’s movement. This makes it impossible to have a simulated cable that is fixed in place on both ends.
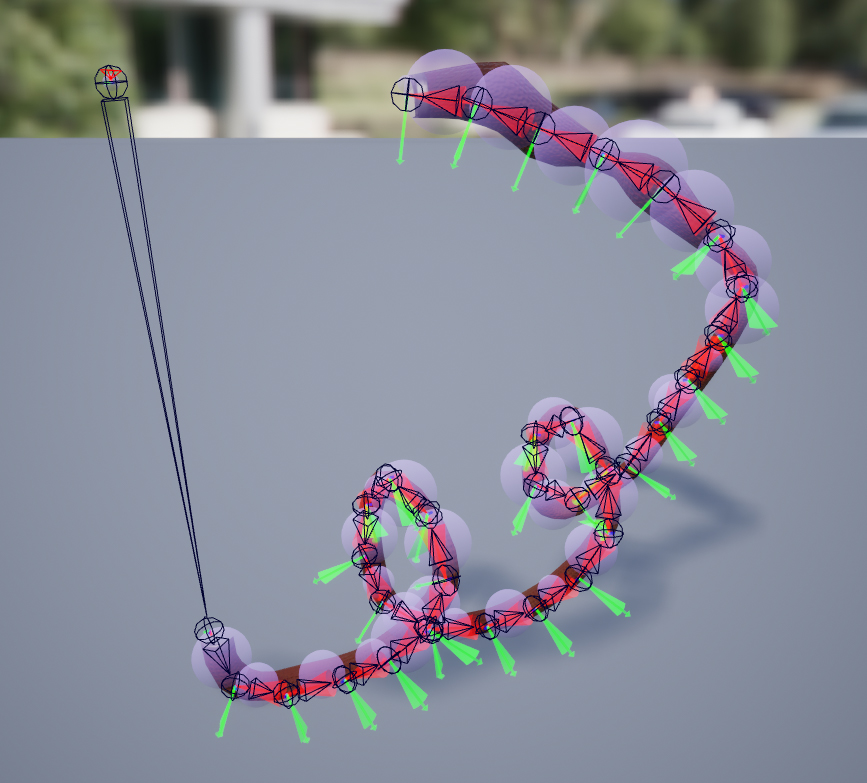
It seems like it should be an easy thing to do right? I hunted high and low and was going insane trying to figure this shit out, even trying to strong arm the physics into behaving via the Blueprint’s Event Graph, but nothing was working. I experimented with using an actual physics asset with collisions and constraints, and that was close but not perfect. This is why I ended up separating the cable into its own asset.
What I ended up doing is far from perfect and it feels like I’m doing something very wrong, but hey, it’s the end result that counts. I generated a body for every bone in the cable chain, made the size something sensible, and then increased body inertia and constraint stiffness to some crazy values. Turns out the way to pin both ends in place was to change the physics bodies in those places to be kinematic instead of simulated. What I wanted was the cable to swing around when moved but return to the original shape, and it really didn’t want to do both of those things, but I found an okay middle ground.
Sky Box
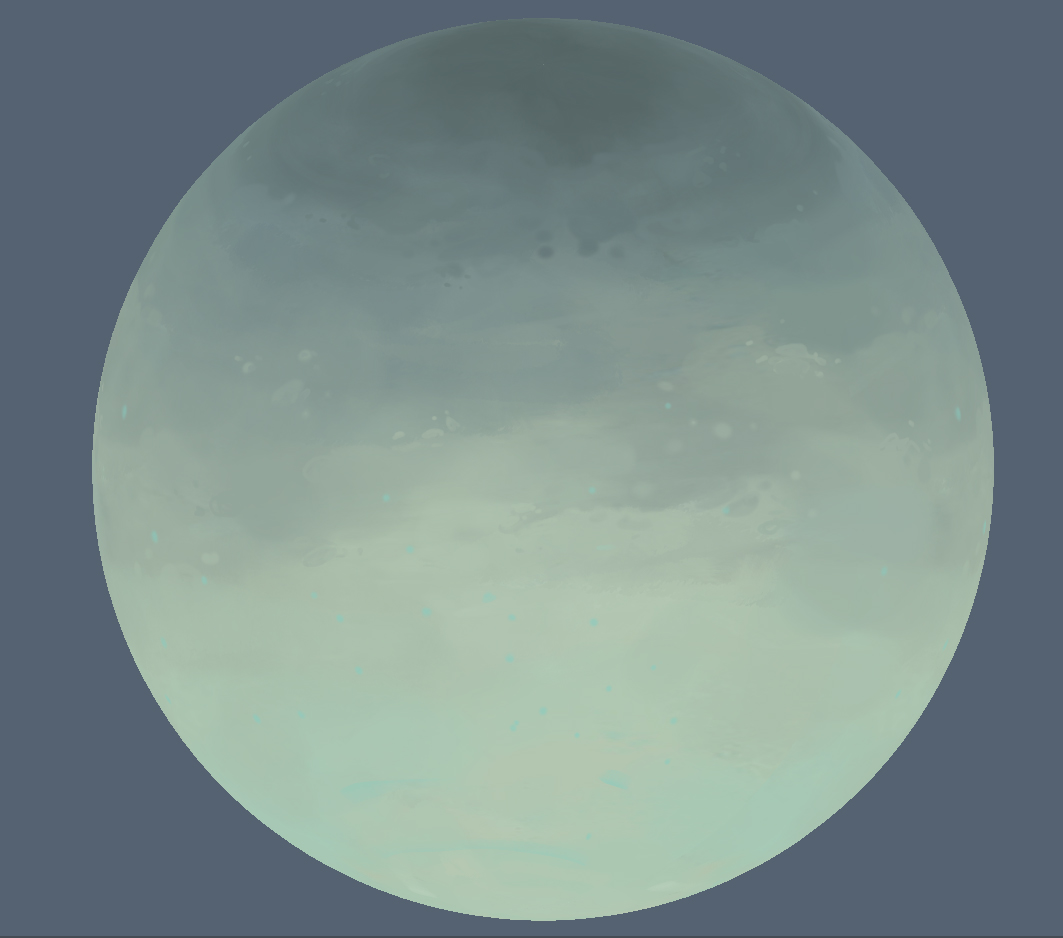
In the Unreal environment, asset colours and final look are heavily affected by the surrounding sky, plus you don’t want to be caught dead with a default sky box in your final presentation. It didn’t take long to do either. My method for painting a sky is to have a sphere with plenty of geo, invert the normals and have the UVs filling 0-1 space.
I then took the sphere into 3D Coat and started painting something simple based on the background of the concept piece. Of course when you actually apply this texture to the sky in Unreal you find out only a tiny portion of blurry texture can be seen, so keep that in mind before bothering to make a masterpiece fresco.
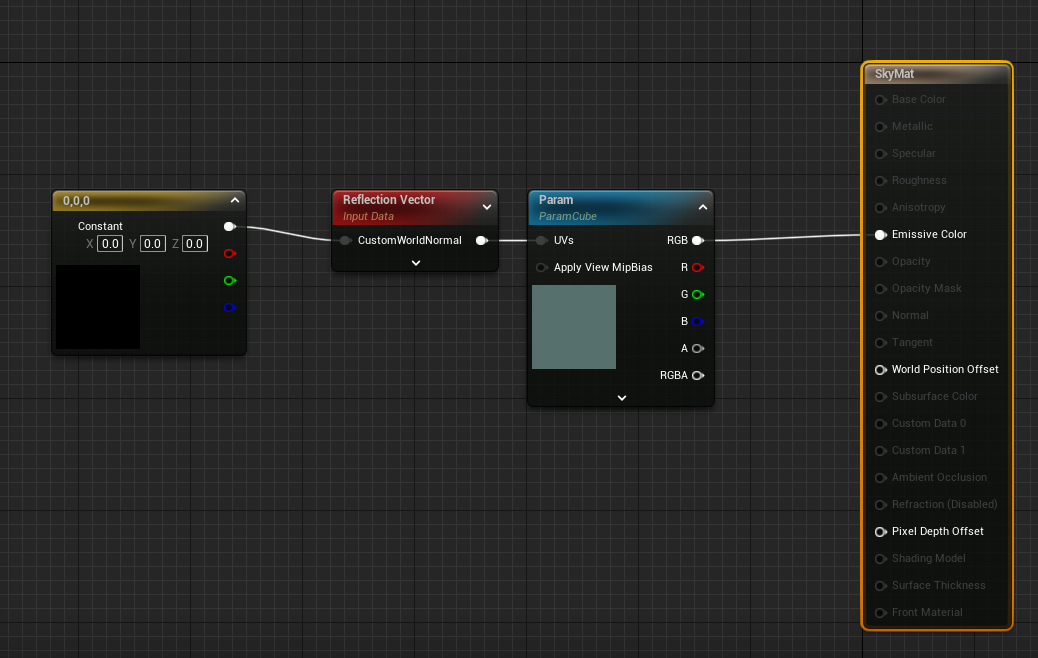
For some reason the texture format needs to be a .EXR to be imported into Unreal as a cube map. The sky also needs a special material, but it’s very easy to make and there are plenty of examples online.
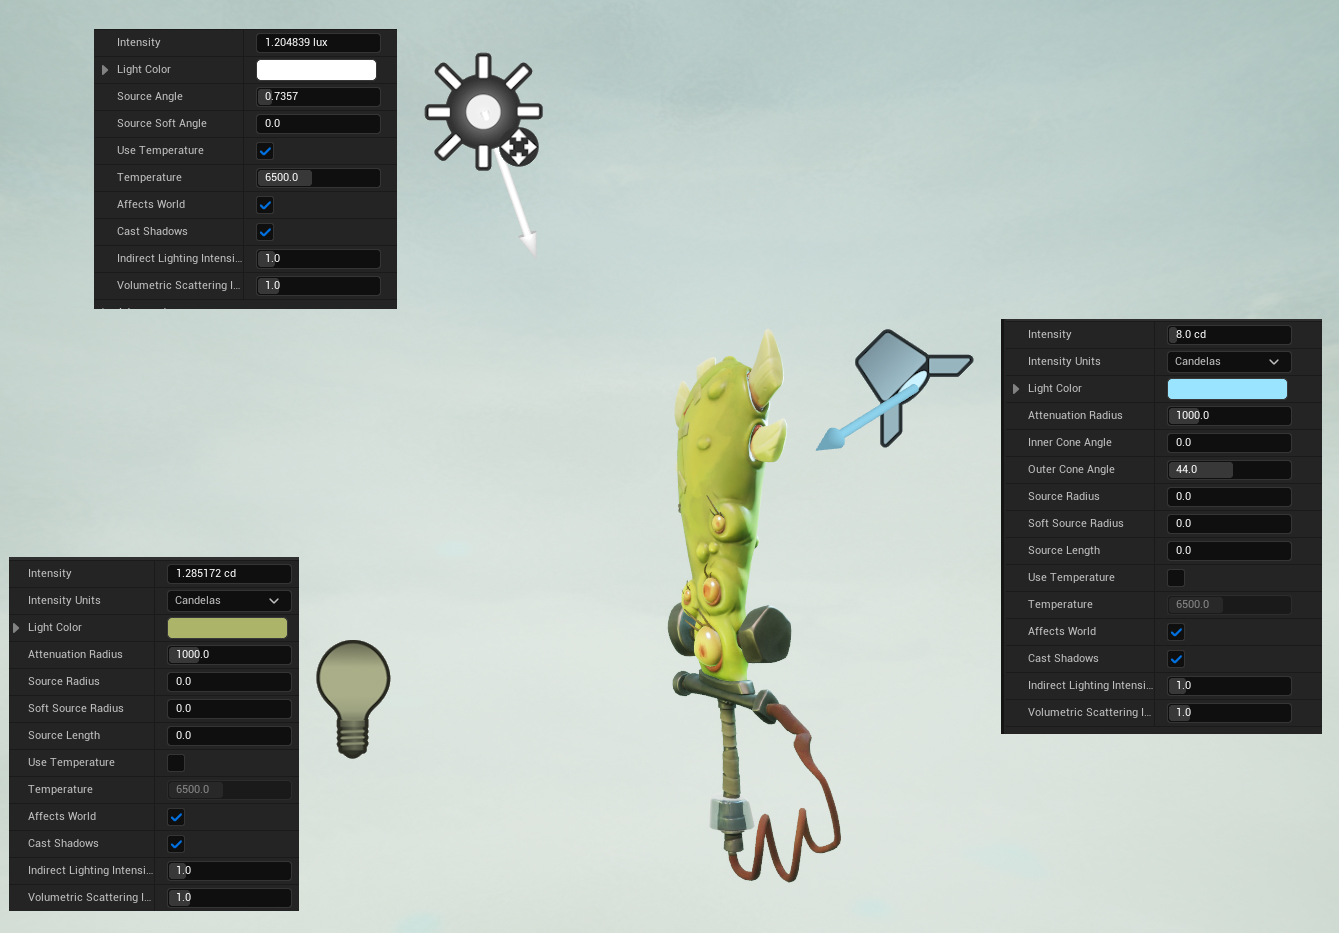
Lighting
I don’t believe a single prop needs complicated lighting, so this is my very simple lighting setup. A neutral white directional light from above, a very bright blue spotlight from behind, and a not so bright yellow omni light from the front and low.
My approach to lighting is to only add as many lights as I think it needs, you can easily make things look worse by creating too many lights that become chaotic.
The Final Cinematic
All the pieces were in place now, I just had to bring it all together in a neat package and I thought the best way to show off the procedural animation would be with some kind of cinematic of the sword in action. I’ve never had to make a cinematic before, closest I’ve done is setting up a stationary camera and rendering a turntable, so it was back to the Unreal docs to read up on what is available.
Turns out there is a very extensive set of tools for essentially filming virtual movies, far more stuff than I needed, but it’s good to know what the options are. I wanted to make an animation of the sword swinging which I did with a Level Sequence. It didn’t feel meaty enough, and that’s where the camera can be used to enhance the motion. I had the camera zoom in and follow the motion of the swings which was already pretty frantic but then I saw there is a camera shake blueprint you can add to the sequence, and that was easy to set up and worked nicely.
I thought it was important to show all sides of the sword which is why I added the little twirl afterwards. Still more exciting than a turntable. Something I wasn’t happy with was how jerky the procedural animation becomes when returning to rest. I fiddled with a few things like the controller’s springiness and the physics tick rate, but it didn’t help. Instead of obsessively spending another day trying to improve the result, I said “meh, good enough” and moved on.
I rendered out the cinematic at 60 fps, you would want to do this even if the target video fps is lower because the physics movement looks bad below 60. Unreal will spit out a huge collection of images in a folder (not a video), so the next step is actually assembling the video. I’ve done very little work with video editors in the past and I just wanted to use something easy and free. If you don’t already have a preference just use DaVinci Resolve, it is the clear winner out of any that I tried. Was very easy to import the folder of images and render it out as a video.
Final Words
I got this thing done and very happy with it, considering I had abandoned it for years it’s kind of a miracle it saw the light of day. It is perhaps the worst way to make something. If you are close to the finish line of a project but you’re out of steam, even the lowest effort presentation is better than dropping it and forgetting about it. I find my biggest adversary when making something is my own enthusiasm towards it.
Even during the resurrection of this project I think I had simply spent too long tinkering with settings and searching for solutions to annoying problems that it was making me tired of the project. It’s good to identify early so you can start cutting corners and think of the bare minimum required to get the thing done.
There is plenty more I could’ve done and would’ve liked to do. I’ve already mentioned some: doing blinks, better eyes, and smoother physics motion. I also thought it would awesome to have lightning particles and a cool trail effect when the sword swings, but I just know that adding these would’ve brought things to a complete halt. Sometimes you just gotta move on and get it out of the door.