Making a Terrain Tileset
Something I’ve had to work out for my mining game is using Godot’s tilemap features and a tileset for the dirt blocks, and because it is destructable that terrain can literally be any shape, so the main challenge is accounting for that. I’ll go through how I made this, plus it might be handy for people that want a cheat sheet of every tile they’ll need to do the same. As far as tools go, I used Aseprite because it has specific tileset and sprite packing features, but you could do this in Photoshop, even MS Paint, it would just be a little more effort.
I should start by mentioning there are so many different ways you could design a tileset. Some things would make your life easier like having non-directional lighting or having a texture that still works when rotated or flipped or simply having strict rules about what shapes will be possible. I did none of these things.
Proxy Tileset
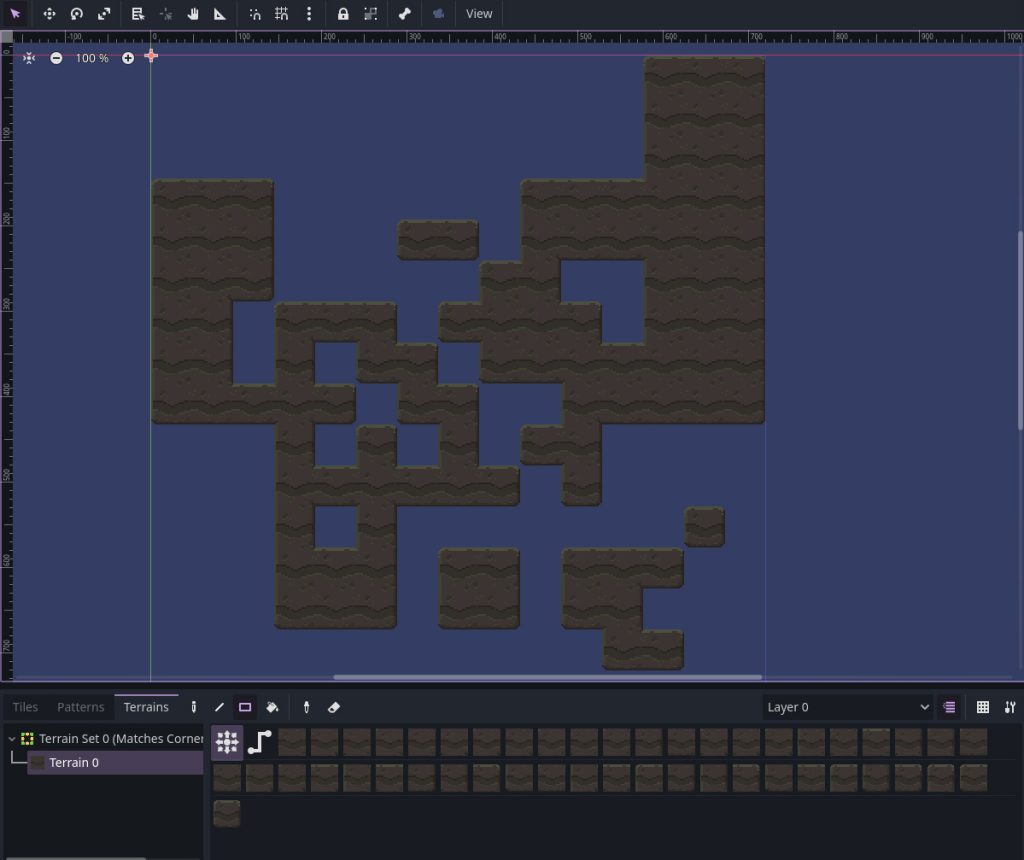
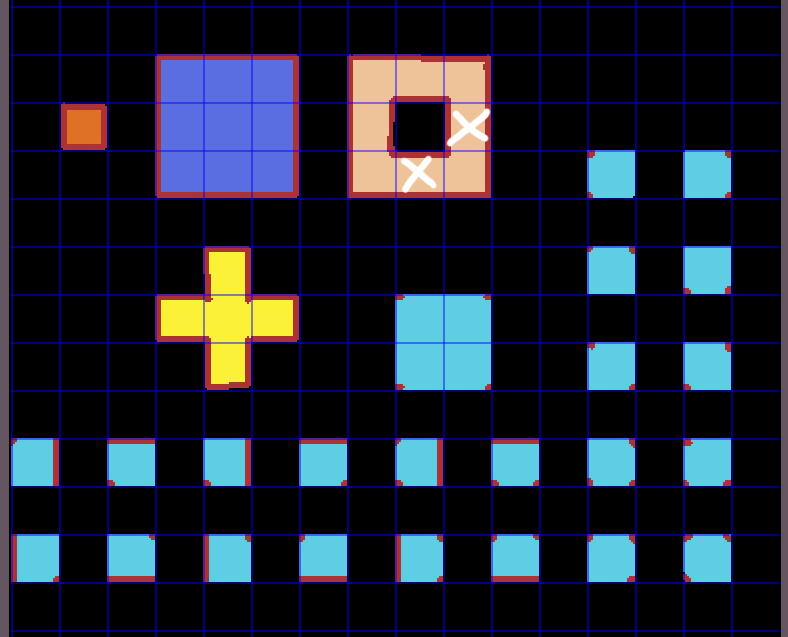
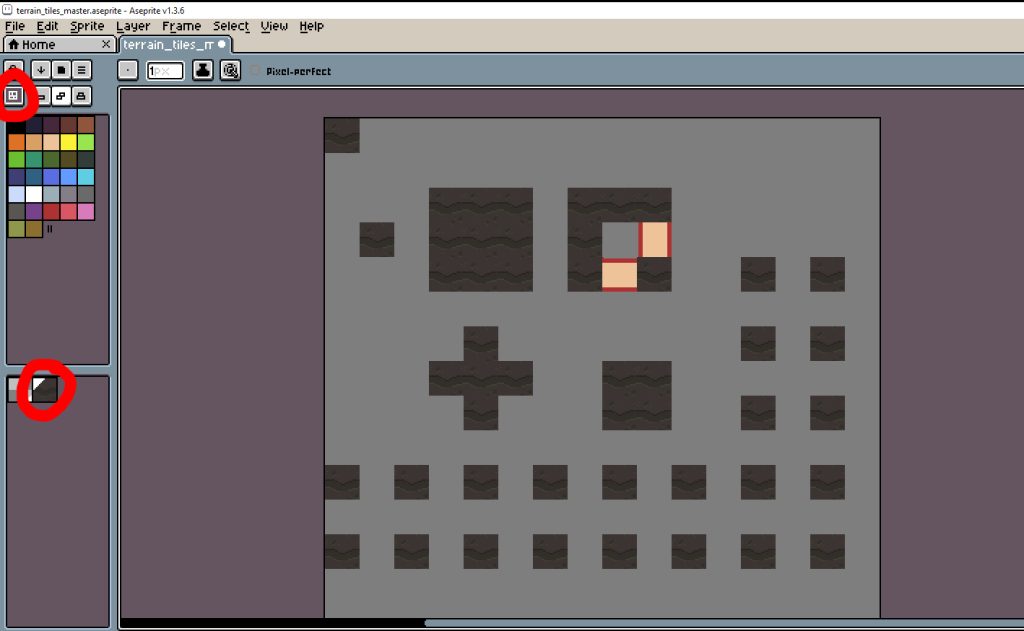
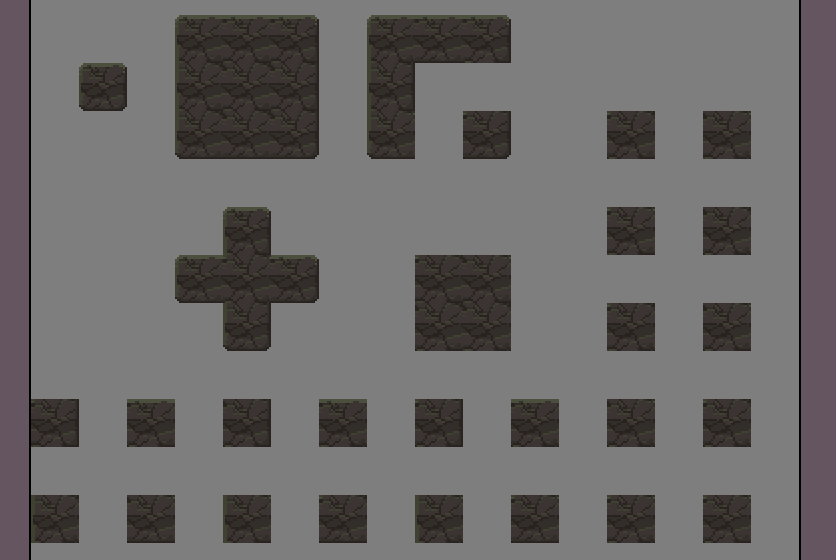
I wanted to first work out what the different tile pieces I’d need and maybe by now there are already hundreds of examples that worked it out, or it even seems like there should be an equation to calculate every unique combination. I’m far too dumb for that, so I just started drawing a crappy proxy tileset, importing it into Godot and adding more pieces as I found the gaps through experimenting. If you are using this as reference, ignore the colours just pay attention to the red edges, those little dots are inner corners and there sure are a lot of them. The crossed out tiles I realised were duplicates and not needed. So how many different tiles did it come to? 47. Seems like a lot, and the majority of those variations are for pieces you’ll rarely see!
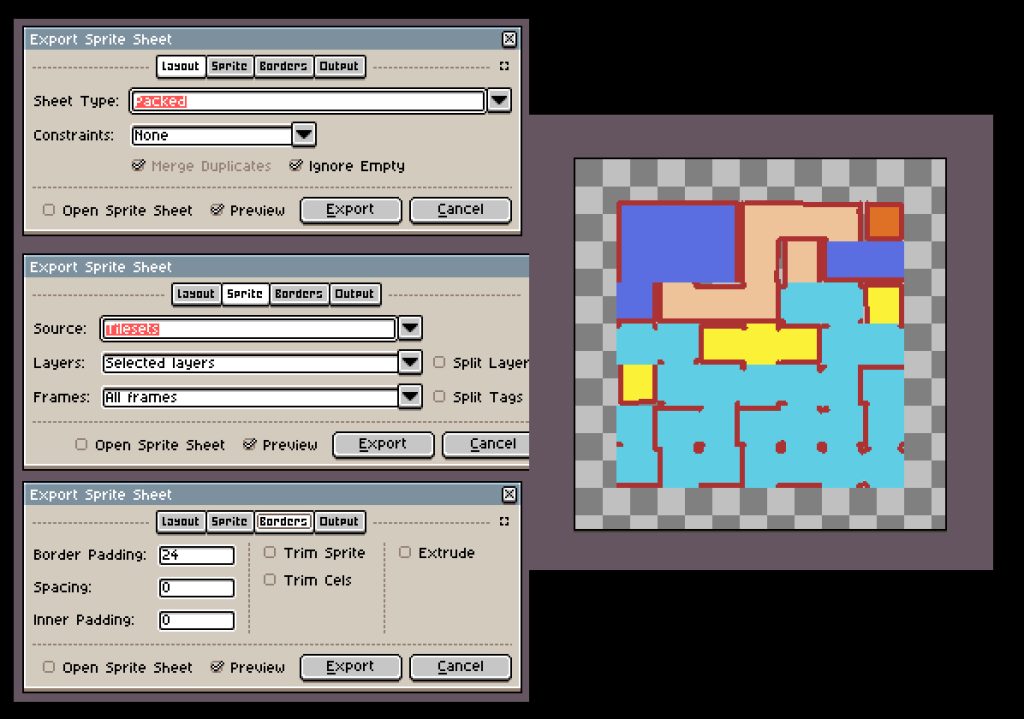
I should touch on exporting/sprite packing: you could export this image and use it as is, but there is a lot of empty space doing nothing but making the image bigger. Sprite packing is the idea of taking out all the empty spaces and making it a nice efficient lump of texture. Aseprite has easy ways to do this in the export menu. For this many sprites you’ll want to select “Packed” for sheet type, “Tilesets” for source, and this is optional but I added padding of one unit around the sheet. Why? I just know from experience you will at some point want to add something extra to the sheet, like tile variants or a unique piece and you’ll need free space for that. Padding all the way around may be overkill, you could just add the padding on one side.
My plan was to import the proxy tileset into engine and set up the tilemap logic, when I’ve finished the art I should be able to just replace the file and it will all work perfectly. It’s great in theory but learn from my mistake: if the proxy and finished tileset have a different amount of tiles the packing algorithm will mess with the order and it will break things when you reimport. So before you go to the effort of setting up the proxy tilemap just be sure you have the exact tiles needed and don’t move their position in the working file either.
Base Fill Texture
I looked at some other terrain tilesets and noticed a lot are done with one tiling texture that serves as the base for every tile. Seems like a good idea to me, the one downside being that it’s repetitive, but there are ways to help that. What wouldn’t be a good idea is putting unique details in every single tile, because really you’re mainly only going to be seeing that one centre piece that fills in shapes.
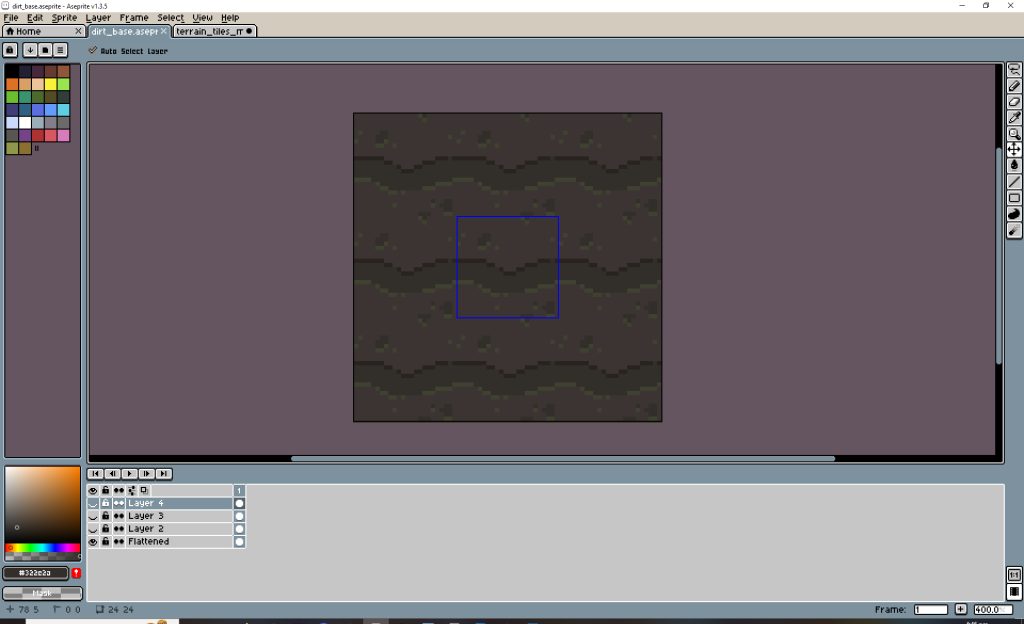
It’s very easy to make this texture in Aseprite (in a new file) with X and Y tiling enabled. Krita has this feature too. Otherwise seamless tiling can be a pain that involves offsetting/copying and pasting layers. Depends on what style you’re going for but I found it’s good to keep things real simple to not become too repetitive. Also make sure to check how it looks on its own, I had to change my first attempt because it had a detail right in the middle and the placement looked weird.
Now that you’ve got this texture, copy it into the tileset working file and in a new layer start plonking it over every space the proxy tileset uses. In Aseprite you can quickly do this by converting the layer to a tileset layer, then use the tile place mode to fill the squares. Or just copy and paste.
Adding Edges
The only thing that is going to distinguish one tile from another is the edge details. I wanted directional lighting on edges and slightly rounded outer corners to look a little nicer, nothing too much. Should you just start drawing these details over every tile in front of you? Absolutely not! Remember it’s all about laziness and minimising effort here. Here’s how I approached it, if you have knowledge of modularity it’ll make sense:
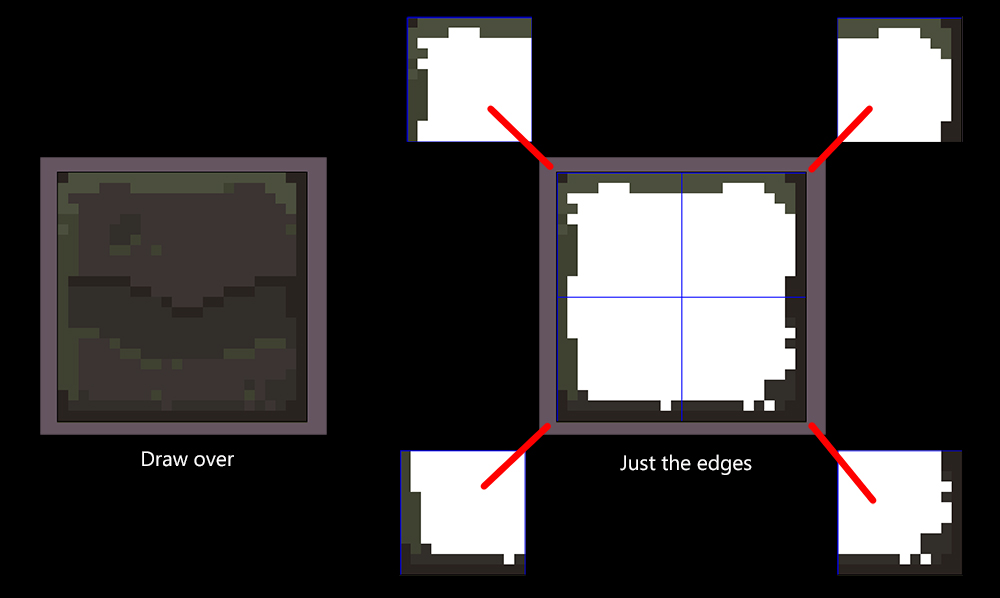
Go back to that base texture file and in a new layer on top draw in your edges on all sides to make it look like an individual block. Now if you divide that into quadrants you’ve already got your four outer corners! You can take these corner pieces and start placing them over the tileset tiles (make sure to keep edges in their own layer). I also rounded the corners off at this point. Next up is the straight edges. I did this in the tileset file working on this 3×3 block.
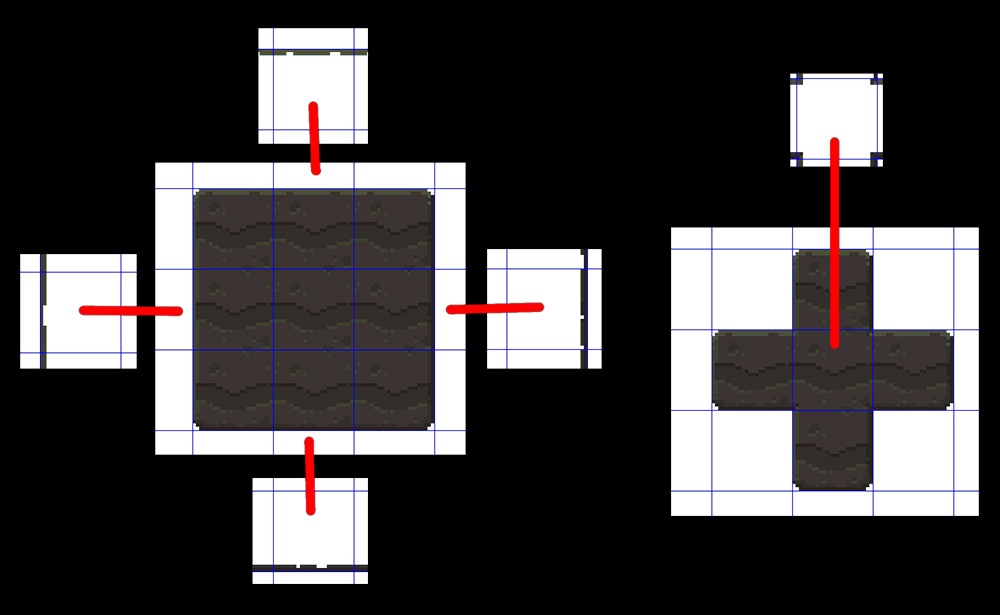
I could already get most of a straight piece by taking the middle span from my edge draw over, it’s just a matter of filling in the blanks and making it connect up to corners. With the straights and outer corners done that’s like 99% of the art done.
Inner corners are the last little bit to do. This plus shaped block was perfect to work them out. With my low-res tiles and thin edges the inner corners were literally 4 pixels each. Ridiculous, almost felt like they weren’t needed but I committed to it.
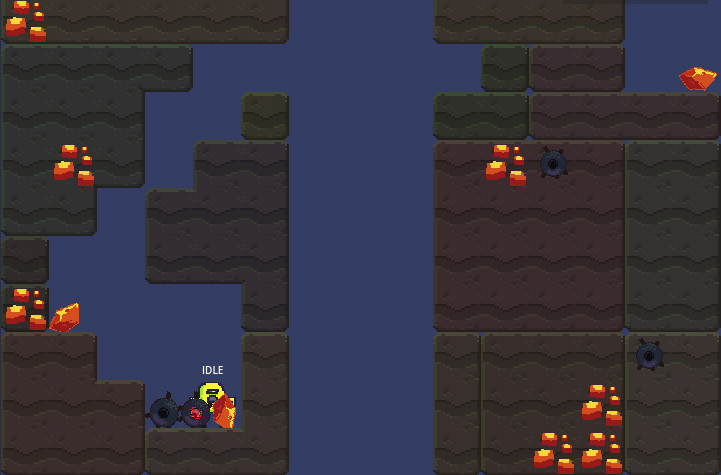
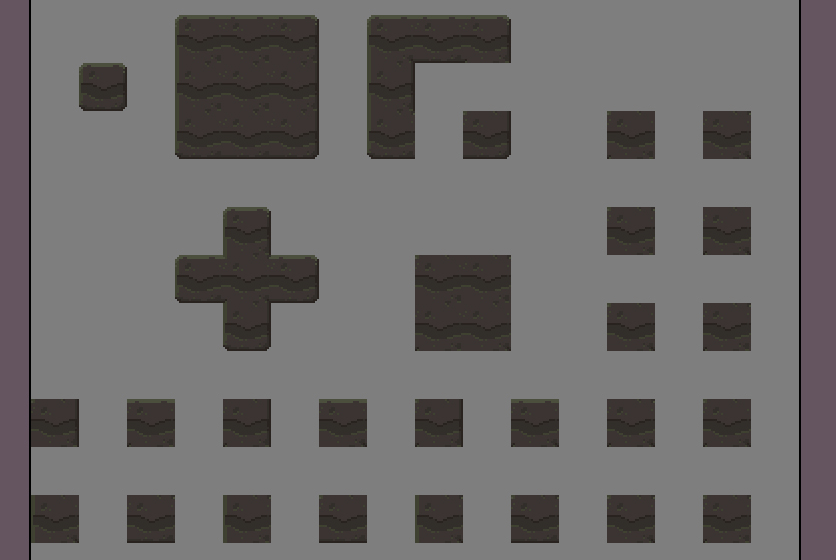
Anyway these are all the edge sub-pieces you need, so with the same modular logic you can fill in everything just by copying and placing these quadrants using the proxy tiles as a guide. This is what my finished set ended up looking like:
Another advantage of making the tileset this way with the base texture layer under the edges layer is that I wanted an alternate tileset of cracked terrain, and it was super easy to do. Just went back to the tiling texture and drew the cracks in, then brought it into the tileset file and did the same placement under the edges layer.